
 Klicke hier für den deutschen Artikel.
Introduction
In the List & Label Designer, only one page is displayed for editing at any given time. This is because List & Label operates on a data-driven basis.
For example, a table or a RTF text can vary in length and size depending on its content - something that is only determined at the time of printing or exporting. The data dictates whether multiple pages need to be generated within the report. Nevertheless, it is still possible to design or edit different pages on the same workspace without the layout becoming cluttered or confusing.
Procedure
For this purpose, you can use layers which can then be assigned to the various objects. Layer 1 can be set for page 1, layer 2 for page 2, and so on.
General information regarding layers can be find in our designer documentation in the chapter Working With Layers.
In our demo application, the Invoice with cover letter report would be a suitable example for this purpose. The demo application is located in your List & Label installation path, usually C:\Program Files (x86)\combit\LL??\Sample Application\DemoApplication??.exe. When running the application, select the Invoices section and open the mentioned example.
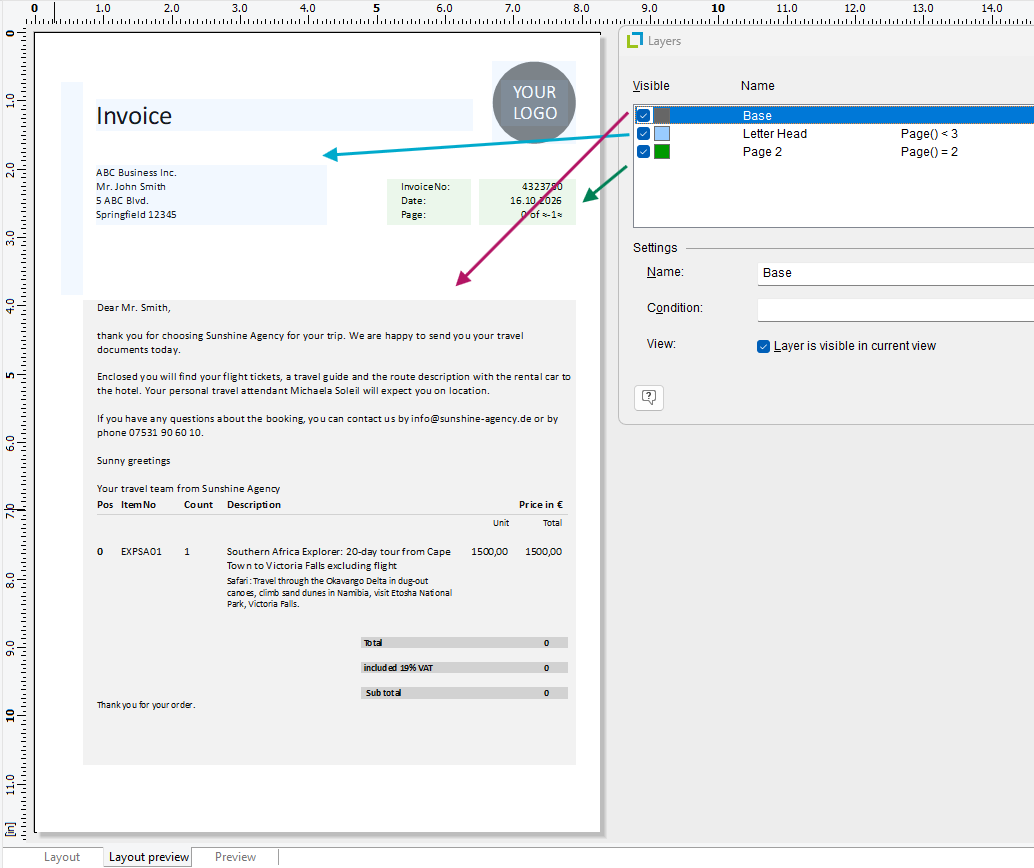
You can clearly see in the example that the various objects are displayed in different colors within the layout preview. These colors correspond to their respective layers.
Accessing and editing layers
In the Layers menu, you can view, create, remove, and edit layers. This menu can be accessed either via the Project > Layers (highlighted in purple in the screenshot) or by double-clicking one of the layers in the layers list (highlighted in red). In a new project, several layers are available by default and ready for use.
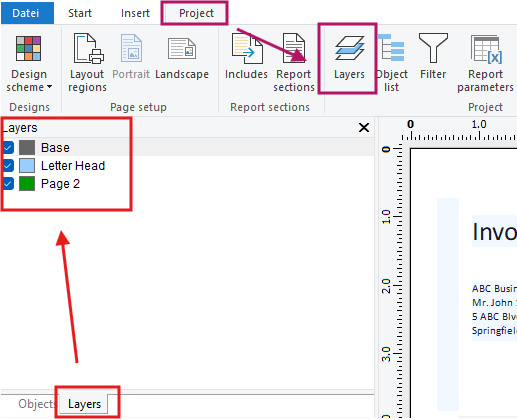
Layer names can be assigned freely, but should be unambiguous for clarity.
Assigning a layer to an object
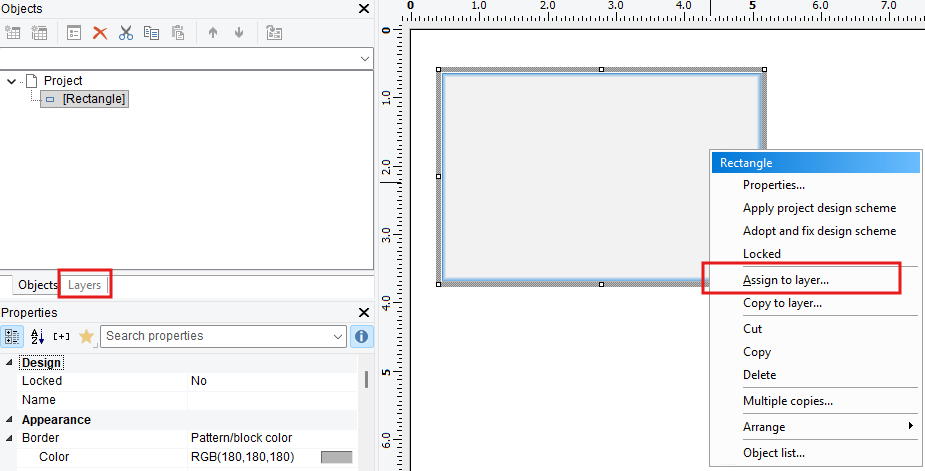
The layers can be accessed as described above; alternatively, you can assign an object directly to a layer - for example, by right-clicking on it - as shown in the screenshot (dialog on the right).
Showing or hiding layers in the workspace
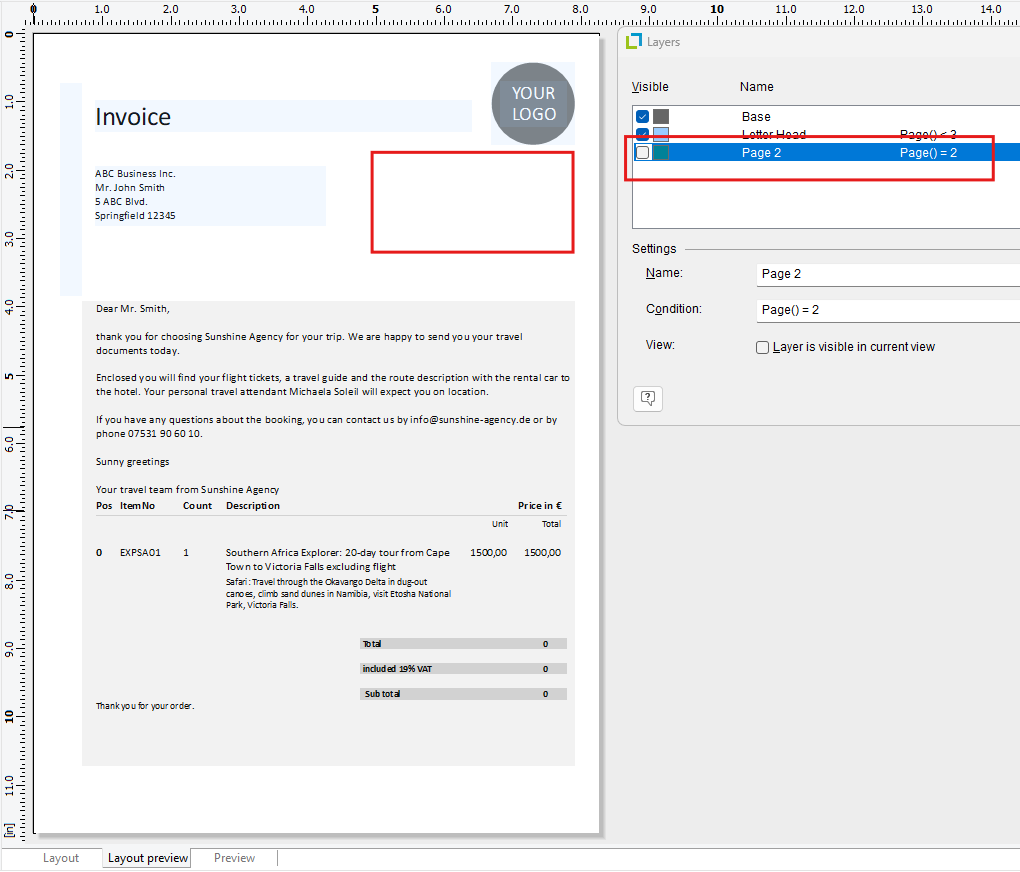
By hiding layers, you can ensure that only the objects required for your current task are displayed on the workspace, allowing you to design an entirely different page. This can be managed in the layout preview or workspace via the Visible or Display option. When a layer - for instance, a layer named Page 2 - is hidden, its objects will no longer appear in the workspace. Please note that this setting applies exclusively to the workspace and does not affect the print preview, the final print output, or any exported files.
Layer conditions
Another option for a layer is the condition, which can be edited in the same menu used for showing or hiding layers. The condition determines when - or whether - a layer (and its associated objects) should be included in an export or printout. In the example above, the condition for the Page 2 layer is Page()=2; this means that any objects assigned to this layer will only be displayed and included on page 2 of the report. You can enter a specific formula for this purpose by selecting Edit and using the formula assistant.
Additional tips
If, for example, a flashcard project is to be created, the project setting Minimum page count also becomes relevant. For this setting to be displayed, Project must be selected in the object list.
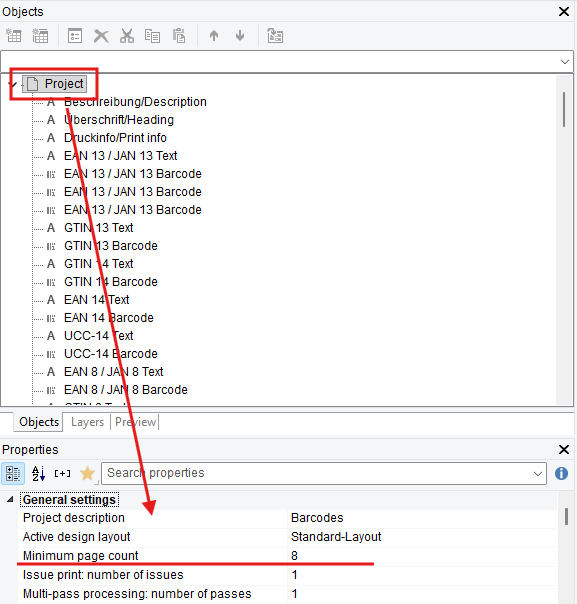
In the example application, the Barcodes report serves to illustrate this; it uses a total of 8 layers to represent 8 distinct pages. The value for the minimum number of pages must be set accordingly. Further information on this can be found in the designer documentation in chapter Minimum Page Count.
Conclusion
In the List & Label Designer you can use layers to easily create different pages on a single workspace without the page getting to cluttered with different objects.